Scenario
We want to build a very simple chat app you can use on your eCommerce website for support questions with the following requirements.
Outcome:
- Create chat rooms on the fly (no backend needed)
- Message delivered confirmation
- Get user updates like, the typing dots
- (Optional) save conversations to a Database
- (Optional) retrieve last sent messages when user connects
Getting started
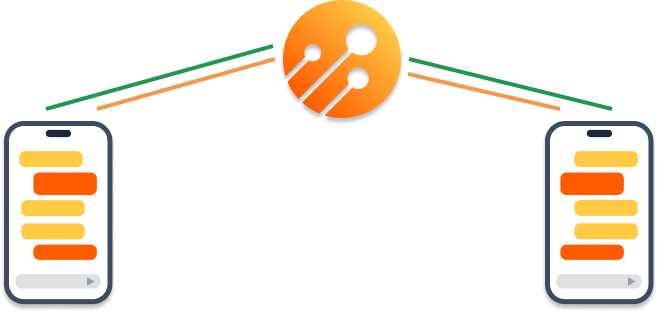
For a visual reference refer to the diagram above.
Create the Topic
NoLag works a little differently to other Pub/Sub solutions out there. For better security and at the same time more flexibility, we can not create Topics on the fly. We have to create them in the NoLag Portal. Let's call our Topic “LetsChat”.
Now we do have a choice here, do we activate or deactivate “NoEcho”. NoEcho will not echo sent messages back to a Publisher. For this application we will switch NoEcho on.
Get the access token
All devices that connect to the NoLag infrastructure require an Access Token.
There are 2 ways to create an access token:
- Through the NoLag portal
- or via an API call
Keep in mind, the Access Token is just a token with an attached set of permissions. NoLag does not use it to manage device state within the NoLag infra. This means, (although not recommended) devices can share the same Access Token.
Create the connections
The whole aim of NoLag is to make real-time easy. With this in mind, we only need the Device Access Token to connect to the NoLag infra.
// TypeScript - Connect to NoLag Infra

const deviceAccessToken: string = "c87806133e9ca4eb1d0f74ac9c683860";

const nolagInstance: ITunnel = await WebSocketClient(deviceAccessToken);
Create the rooms
To create a new chat room, we will use NQL identifiers. NQL identifiers give us the ability to fine tune who will receive what messages
Before we can all jump into a chat room, we need to first create a unique UUID.
// Create unique room ID

// roomID
"81cd94e5-76b6-451a-911b-2833177b899d"

// share this URL.
"http://mychatroom.com?roomId=81cd94e5-76b6-451a-911b-2833177b899d"
Lets chat (Refer to orange line in illustration)
Now this is where the “magic” happens. We will use the above UUID as the common NQL identifier.
The Publisher will publish messages to Topic “LetsChat” and attach the identifier “chatRoom_81cd94e5-76b6-451a-911b-2833177b899d”.
The Subscriber will subscribe to Topic “LetsChat” and will be listening to the NQL identifier “chatRoom_81cd94e5-76b6-451a-911b-2833177b899d”.
Now all messages sent and received will be isolated to the set chat roomID, even though the Topic name is not unique. That is pretty much it!
"Think of it as a reverse query, the Publisher pushes data into NoLag, and the Subscriber queries the data using NQL identifiers."
// TypeScript - Setup chat

// import queryString from 'query-string';

const { roomId } = queryString.parse(location.search);

const topicName: string = "LetsChat";

const letsChat: ITopic = nolagInstance.subscribe(topicName);

// receive data from Topic name
letsChat.onReceive((received) => {
  // chat messages will come in here
});

// join chat room
letsChat.addIdentifiers({
  OR: [
   `chatRoom_${ roomId }`
  ]
});

// send some chat messages

const payload = {
  userName: "John Doe"
  userId: "30b570f3-8fb0-452b-bd16-1d171af92d62",
  message: "Will be there soon!",
  messageId: "2dd170f6-23ac-4f5a-aef9-34f7cd31c985"
  mediaURL: null,
}

const nqlIdentifiers = [
  `chatRoom_${ roomId }`
]

// publish chat message
nolag.publish(
  topicName,
  stringToArrayBuffer(JSON.stringify(payload)),
  nqlIdentifiers
);
Your own commands (Refer to green line in illustration)
To get the “Is Typing” animation to activate, create a new Topic called “LetsChatCommands”. When a Publisher is busy typing a message, use their keystroke as a “isTyping” command trigger. All members of the chat will receive the animation request.
We can use the same Topic to also confirm messages read.
New friend joins the chat, on the “LetsChatCommand” publish the new fiends name.
// TypeScript - Publish and subscribe to commands

const topicName: string = "LetsChatCommand";

const enum ECommands {
  NewUser = 1
  Typing = 2,
  MessageRead = 3,
}

const letsChat: ITopic = nolagInstance.subscribe(topicName);

// receive data from Topic name
letsChat.onReceive((received) => {
  // commands will come in here
});

// make sure you are listening to the right chat room commands
// we use the same "roomId" for this
letsChat.addIdentifiers({
  OR: [
   `chatRoomCommands_${ roomId }`
  ]
});

// send commands

const payloadNewUser = {
  command: ECommands.NewUser,
  userName: "John Doe"
  userId: "30b570f3-8fb0-452b-bd16-1d171af92d62",
  messageId: "55b1e9ec-48ad-4260-b8c0-a4884c2c8eab",
  commandId: "2dd170f6-23ac-4f5a-aef9-34f7cd31c985",
}

const payloadTyping = {
  command: ECommands.Typing,
  userId: "30b570f3-8fb0-452b-bd16-1d171af92d62",
  commandId: "2dd170f6-23ac-4f5a-aef9-34f7cd31c985",
  commandId: "e4fd4fc9-5dc7-4ea9-8c1f-e7ce5b321ccb",
}

const payloadRead = {
  command: ECommands.MessageRead,
  messageId: "42e2493d-4464-49ed-9de6-350d4f746c1a",
  commandId: "2dd170f6-23ac-4f5a-aef9-34f7cd31c985",
}

const nqlIdentifiers = [
  `chatRoom_${ roomId }`
]

// publish chat message
nolag.publish(
  topicName,
  stringToArrayBuffer(JSON.stringify( payloadNewUser || payloadTyping || payloadRead )),
  nqlIdentifiers
);
Optional features
If you want to save conversations on all messages sent, you will need your own backend. We can then set up a trigger webhook on the Topic name "LetsChat" and send all messages to your own backend API end-point.
If you want to pull the latest chat messages from your server, set up a Hydration webhook that points to your own backend.
Read more
For more details, explore our developer documentation.